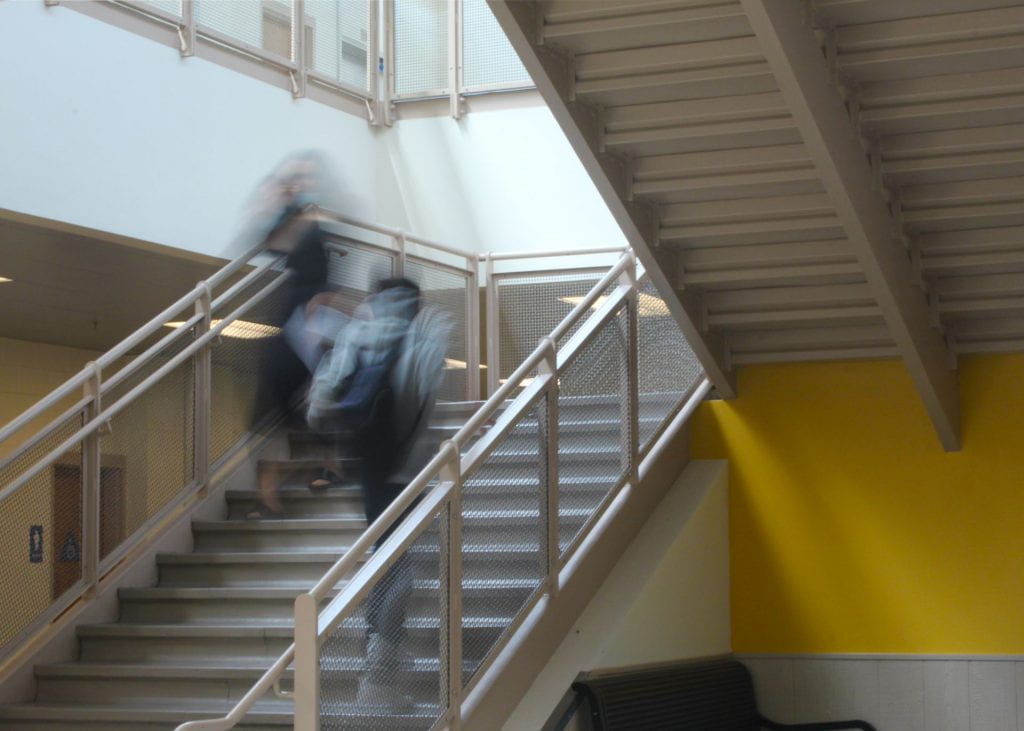
What is action sharp? Action sharp is when you want the subject to be in focus with clear lines, crisp details, and no blurring. When trying to capture a perfect action shot you have to first get your settings right. Then you need to freeze the action. To do this you’ll need to choose a fast shutter speed. After that you need to do add motion. You will want to use a wide aperture, such as f/3.5 or lower.
It will create a narrow depth-of-field, and it helps the person or thing stand out, as the background distractions will be blurred. Picking your spot is very important when doing action sharp because when capturing an action sharp photo it all has to depend on whether you have a short or a long zoom lens. If it is possible, it’s a good idea to put yourself in a position where the person or object will be coming towards you. So basically it is just a good idea to get in the middle of the action. Hitting focus and getting the time right is really important too.


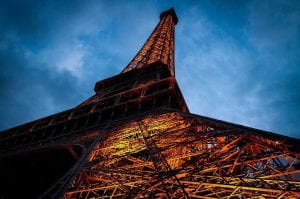
TV, ISO 400, 1/2 sec, f/22, 43mm

This image shows motion blur because of how the camera captured the lights while the object is moving. I am guessing that the stutter speed was on point because if the shutter speed is to fast, it won’t capture much movement. When taking a motion blur photo will have to use a tripod because if you don’t the photo will come out super blurry. when you want to compensate for long shutter speeds when there is too much light you have to first use a small shutter speed. If you’re shooting in Shutter Priority, your camera will actually narrow the aperture for you. Then you have to Decrease your ISO. ISO impacts the sensitivity of your digital camera’s sensor to light, where a higher number will induce greater sensitivity and a lower number will induce less sensitivity. Finally you can try to a density filter. It’s a piece of glass that blocks light from passing through your lens.

TV, ISO 400, 1/4 sec , f/20 ,18mm
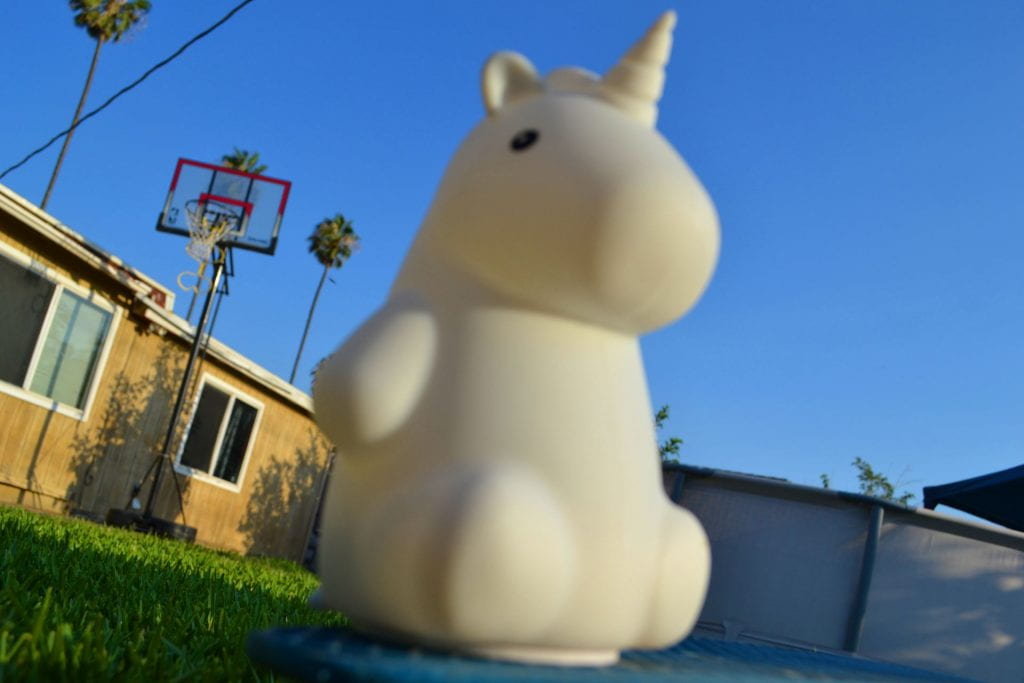
Depth the field explained: Depth the field makes images appear sharp and in focus. There is a point focus in every picture. The sharp zone will vary from photo to photo depending on different factors. Images that are sharp from front to back have a deep depth the field. Whether the image has a shallow depth of field or a deep depth of field it can make a huge difference. There are three main factors that determine depth of field are Aperture, Distance between your lens and your subject ,and focal length of the lens. Large aperture equals a Small f-number which equals Shallow.
If you want to photograph a landscape and you want a deep depth of field, you have to set your aperture to f/11 .So the closer your subject is to the camera, the shallower your depth of field becomes. The longer your focal length, the shallower the depth of field. How to approach depth the field. First you set your camera to aperture priority or manual mode. Then you have to determine whether you want a deep or narrow depth of field.Next you adjust your aperture, distance to subject, and focal length

AV, IOS 800, 1/125/ f16,18mm

AV, ISO 800, 1/500, f5.6, 55mm

ISO 180, 1/500, f5.6, 200mm

F16, 1/60, 28mm
JPEG: JPEG files are compressed in-camera and they are essentially set up to store as many images on the memory card as possible.
TIFF: TIFFs files are uncompressed and they are much bigger files that will take up a lot of space in your memory card and on your computer.
RAW: RAW files are created using a process that retains all of the information originally captured. RAW is the best option if you want to get the highest quality files from your camera.
DNG: DNG files is an attempt to provide a standard RAW file for all manufacturers and cameras. It is offered as a main RAW file format, or as an alternative to the manufacturer’s native RAW format.
PNG: PNG files are compressed in a lossless format and therefore it retains all detail. PNG quality doesn’t mean big file sizes and this is useful on the internet because you need pages to load quickly.
GIF: GIF files can only contain a maximum of 256 colors. GIFs are not the best choice for photos but rather for images with a limited color palette.
BMP: BMP files are large files that the color data is saved in each individual pixel without any compression.
PSD: PSD files allows for manipulation on specific individual layers rather than on the main image itself.

I really like this surrealism image because it has so much detail in in. I like how Jerry Uelsmann added wings to the person. I also like how the person is in the water and is leaving like a path of light. I also really Like the birds that are in the sky. Overall I just really like this image because of how it all fits all together and I like that the image is in black and white.

Atomic Mode: Auto mode tells your camera to use it’s best judgement to select shutter speed, aperture, ISO.
Portrait Mode: Portrait mode works best when you’re photographing a single subject so get in close enough to your subject.
Macro Mode: Macro mode lets you move your closer into your subject to take a close up picture. It’s great for shooting small objects.
Landscape Mode: Landscape Mode sets the camera up with a small aperture to make sure as much of the scene you’re photographing will be in focus as possible.
Sports Mode: Sports mode attempts to freeze the action by increasing the shutter speed.
Night Mode: Night mode is for shooting in low light situations and sets your camera to use a longer shutter speed to help capture details of the background.
Movie Mode: Movie mode extends your digital camera from just capturing still images to capturing moving ones.
Aperture Priority Mode (A or AV): This mode is where you choose the aperture and where your camera chooses the other settings to ensure you have a well balanced exposure.
Shutter Priority Mode (S or TV): Shutter Priority Mode would use this mode where you want to control over shutter speed.
Program Mode (P): Program mode gives you a little more control over some other features including flash, white balance, ISO etc.
Manual Mode: Manual mode lets you have full control over your camera and need to think about all settings including shutter speed, aperture, ISO, white balance, flash etc.

Nikon, M, f/6.3, 1/800, ISO 200

This image is a successful photograph because of the way the camera is angled and it shows the butterfly and flower from above. The camera points down to a higher angle to the object or in this case the butterfly and flower. I really like how its angled because you get to see the view from above and can see what is happening. I also like the way the camera captures butterfly at the right time. I feel like if the camera would be angled straight it wouldn’t capture what’s happening on the top. I think what’s happening on top is the most important thing in this photograph. The reason why i choose this image was because it caught my eye. Also because I love butterflies and flowers so it was really easy to choose this photo. I also would of wished if this image would of had color. I think the photo still looks really pretty in black and white. I feel like the angle it was taken in was the best. I feel like from below you wouldn’t really see the top. From straight ahead I feel it would just be boring. But that’s just my opinion. Overall i think this is a really good photo.
Nikon, M, f/6.3, 1/800, ISO 200

Nikon, M, f/6.3, 1/800, ISO 200

Nikon, M, f/6.3, 1/800, ISO 200

M, f/8, 1/60 sec, ISO 400
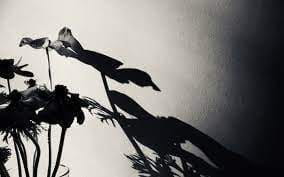
One of the main elements of this photo that has shadows is the reflective light. You can see that a light is facing the flowers which makes the flowers cast shadows. The color of this photo is black and white which makes the shadows look better in my opinion. the blank and white really makes the shadow pop a lot. I also like how it even shows the texture the flowers have through the shadows. It also really bring out the depth of the picture which is really nice. The shape of the shadow changes based on the light source. The distance and the light really shows the scale of the shadow. This picture isn’t really in an angle but you can tell how big the shadow looks compared to the flowers. Overall this picture is a good picture that shows shadows.

M, f/8, 1/60 sec, IOS 400